By cuterose
The smart way to switch to a new Android phone
Ah, a new phone. Isn't there just something strangely special about that moment of opening up a box, peeling off the protective plastic, and powering up a pristine pocket-computer for the very first time?
Unfortunately, after that fantastical startup animation finishes, reality usually sets in — and you realize you're in for a long, exhausting journey of copying stuff over, setting things up, and trying to get your fancy new phone to look and act the way you want.
To be fair, moving from one Android phone to another has gotten a heck of a lot easier over the years. But despite all that progress, it can still be a daunting process that's filled with both quirks and uncertainty. And all the internet's advice about moving from an iPhone to Android won't help you one bit.
This guide, however, will. If you're already in the Android universe and preparing to move from one Android phone to another, these are the steps and the variables you need to consider. Follow 'em closely, and you'll be up and running and enjoying that new phone smell in no time.
Part I: Prepare your old Android phone for switching
Believe it or not, a successful Android phone move starts on your old device — the one you're ready to leave behind. Before you even start thinking about your shiny new replacement, we've got two important areas to work through and make sure are fully prepared for migration:
Android service syncing
First and foremost, the reason switching from one Android phone to another is so much easier than it used to be is largely thanks to all of the simple syncing systems built into our devices. So take a minute to make sure you're taking full advantage of those possibilities. It'll set your phone-moving voyage up for much smoother sailing.
And here's the best part: If you use all of Google's built-in Android migration mechanisms, you don't even need Samsung Smart Switch or any other proprietary systems (and you can safely skip over those if the prompts come up during your new phone setup). Everything with the core Google Android phone-switching tools should just work, once fired up properly — and in most cases, it'll require very little thought or effort.
To start:
Most other areas of Android tend to be synced automatically and without any manual work whatsoever these days — your calendar, your notes and documents, any files connected to Google Drive or other cloud storage services, and so on. More often than not, even something like a music collection is now tied to a streaming service and designed to be available anywhere.
If you think of anything on your device that's an exception, though, now's the time to take stock of it and be prepared to deal with it later — by copying it to a cloud storage service, transferring it to a computer, or setting it up to automatically sync from your old phone to your new one.
RCS message migration
Here's one important part of the Android phone switching process that isn't exactly obvious or intuitive: If you're using the Google Messages app, you need to sign out of its RCS Chat system on your old device prior to moving into your new phone.
RCS stands for rich communication services. It's a newer messaging standard that allows you to have a more modern-feeling chat experience with other people who are also using it — seeing active typing indicators and read receipts, being able to share larger-sized files, and knowing all of your communications are encrypted.
But RCS, by its nature, is connected to only one device at a time. And if you try to move into a new Android phone without first disabling it on your old one, you're bound to run into problems.
Luckily, the fix for this is simple — at least, once you know how to do it. Just be sure to wait to do this until you're 100% ready to sign into your new device:
If you want to be extra-cautious, you can also head over to this web page, scroll down to the bottom, and put your phone number into the form. Follow the steps to verify it, and that'll sign you out of RCS entirely at the server level. (That's also a good option to keep in mind if your old phone is lost, broken, or otherwise unavailable.)
I'm sitting out front and my sister and her two friends are learning how to do tricks on a scooter and the only thing I can think about is u
— maddie 🥀🌵🌻 Fri Nov 23 17:16:31 +0000 2012
Once you've done that, there's more one final step that's important to do: Turn your old phone off. That'll finish severing the connection between RCS and that device and get you ready to sign into the Chat feature on your new Android phone.
Got it? Good. Now we're ready for the fun part.
Part II: Transfer data to your new Android phone
Congratulations! You're officially ready to power up your pretty new Android companion.
The exact steps and interfaces involved here may vary somewhat from one device and Android version to another, but the basic elements should always be pretty much the same.
When you first start up your new Android phone, it'll ask you to insert a SIM card, if you haven't already. If you had a physical SIM card in your old phone, you should be able to bring it over to the new one. Just look for a tiny slot somewhere along the device's sides. You'll typically need a small pin-tool to get it to open. In a pinch, even a paperclip can work. (And if the SIM card doesn't seem to fit, it may be a different size. You'll either need to pick up an inexpensive SIM card cutter or adapter — or, better yet, just ask your carrier for an updated replacement. Most carriers will provide those at no extra charge.)
Depending on your carrier, you may also be able to activate your service without a physical card by using an eSIM. If you see that option, you can certainly try it to see if it works.
After that, Android will need to connect to a Wi-Fi network to continue the setup. Select the name of your home or work network, put in the password, and wait a few minutes while the system gets things ready. (This is a fine time to pause and go get yourself some pretzels, a hearty portion of pudding, and/or a pastrami sandwich. Don't worry: I'll wait.)
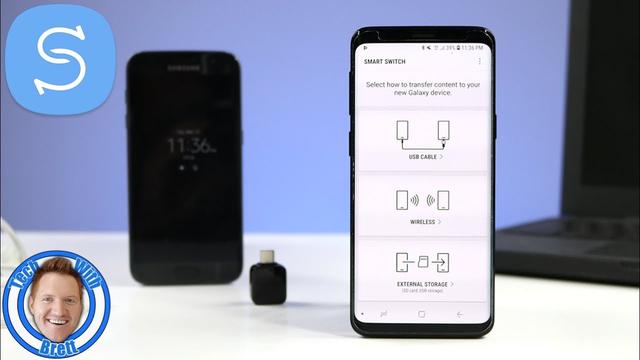
Once you see a screen prompting you to copy your apps and data, you're ready to get rolling. You should have the option to use a physical cable connection between your old and new phone or to rely on your latest Google-stored cloud backup to handle this part of the process. The cable path is typically a teensy bit faster, but you'll reach the same destination either way.
If your old phone is inaccessible or you don't have a cable handy, the cloud backup path is obviously the way you'll need to go. Look for a line that says "Can't use old phone" — or something along those general lines — to get there.
Your old phone will prompt you to confirm that you want to copy all of your info over, and you'll then have to type in your Google account password on the new phone to confirm. And then, you'll have the opportunity to choose exactly which bits of info you want to bring over.
I'd strongly suggest taking a moment to think carefully about what you do and don't actually need. Especially when it comes to your apps, this is a rare chance to give yourself a fresh start and leave some of the dust-collecting virtual cobwebs behind. So before charging forward, tap the line that says "Apps," tap the topmost checkmark to unselect everything, and then manually select only the apps you genuinely still use with any regularity.
A good rule of thumb: If you don't think you'll use something within the next week, don't select it. Odds are, you won't even know it's gone — and your phone will have more space, fewer wasted resources, and fewer unnecessary third-party permissions granted as a result. And if you do find you miss something later, it'll take all of 20 seconds to head into the Play Store and reinstall it.
Apps aside, this part of the Android phone switching process will also offer you the opportunity to transfer certain types of data directly from your old phone — including any photos and videos that are stored locally as well as any music or other types of audio. If you've already backed those items up to a cloud service, you can safely uncheck them here and avoid filling up your phone's storage with redundant local copies.
And finally, you'll see a checkbox to copy over your device settings. That one's important and something you'll absolutely want to leave checked, assuming you're happy with how you've had things set up before.
Once all that's done, you'll just have to leave the phones connected for a few minutes while they finish their work. And you can move ahead with the final parts of your new phone configuration process.
Part III: Set up your new Android phone
Take a deep breath: You're almost done! All that's left is to get a few odds and ends configured on your new Android phone.
Your biggest remaining task at this point is to open up your important apps, one at a time, and make sure you're signed in and set up as needed within each one. In theory, most apps should do most of the heavy lifting for you, but this part of the process often isn't as smooth and simple as it oughta be.
A few specific areas to make sure you don't overlook:
And wouldya look at that? You've just switched Android phones and successfully migrated all of your important stuff over. You should now be ready to charge forward — in your lovely new virtual home but with all the comforts and conveniences of your old one.
That wasn't so bad, right?
Related Articles

The Benefits of a Digital Mobile Phone and How They Keep You Connected
Some Easy Tips to Buy a Second Hand Mobile Phone Online
Why Should You Buy Slide Mobile Phone
Why You Should Get an Intelligent Case For Your Mobile Phone


